

A brown ring on the ceiling is not a paint problem until you know why it appeared. It may be old rainwater from a roof leak, a slow plumbing drip, or condensate from an air-conditioner drain — and each needs a different repair.
This guide helps you trace a ceiling water stain without guessing, make the area safe, and decide when the ceiling is dry enough to repair and repaint. Start with the stain, but investigate the space above it.
Phase 1: Make a Ceiling Water Stain Safe Before Investigating
Water and electrical fittings are a bad combination. If the stain is wet, growing, bulging, or close to a light fitting, keep people and furniture clear of the area and switch off the affected circuit at the distribution board if you can do so safely. Do not touch a wet light, ceiling fan, or exposed wiring; arrange an electrician or qualified repair professional instead.
Check whether the stain is active
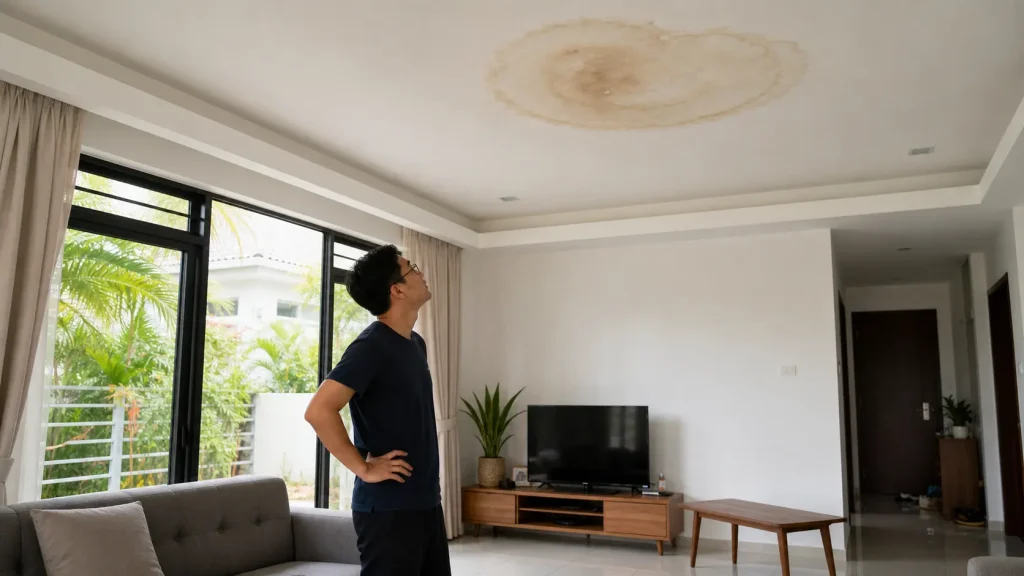
Take a clear photo, then draw a light pencil outline around the outer edge of a dry-looking stain. Check it again after rain, after using an upstairs bathroom, and after the air-conditioner has run. A stain that spreads, darkens, feels damp, or produces a drip is active; painting over it now will only hide the evidence.
- Soft or sagging ceiling — treat it as a possible collapse risk and stay out from underneath it.
- Musty smell or mould — indicates ongoing moisture or poor drying, even if there is no visible drip today.
- Dry, unchanged ring — may be an old leak, but still needs a sensible source check before repairs.
Note exactly where it sits
Use your phone to photograph the spot from below, then compare it to the layout above and beside it. Water can travel along concrete, beams, pipes, wiring conduits, or roof framing, so the leak may not be directly above the centre of the stain.
For a stain beneath an upper-floor bathroom, kitchen, or balcony, note which fixtures and pipes are nearby. For a top-floor room in a terrace house, also note the nearest roof valley, flashing, gutter, skylight, or air-con outdoor-unit pipe route.

Phase 2: Match the Ceiling Water Stain to the Most Likely Leak
Timing is your best clue. Instead of opening the ceiling immediately, observe what happens around the stain during normal use and weather. This narrows the search and prevents a random, messy repair.
| When the stain changes | Most likely source | First place to inspect |
|---|---|---|
| After heavy or wind-driven rain | Roof, flashing, gutter overflow, balcony waterproofing | Roof line and exterior directly upslope of the area |
| After showers, toilet flushing, or using an upstairs sink | Supply pipe, drain, toilet seal, shower waterproofing | Bathroom fixtures, pipe joints and floor area above |
| After the air-conditioner runs for a while | Blocked condensate drain, damaged drain pipe, poor insulation | Indoor unit, drain hose route and ceiling void nearby |
| At any time, even in dry weather | Pressurised water pipe or concealed plumbing leak | Water meter behaviour and plumbing route above |
Trace rain-related stains from the roof down
If the mark grows after rain, inspect the roof only from a safe position and only when everything is dry. Look for blocked gutters, slipped or cracked tiles, rusted roof screws, damaged flashing, and gaps around vents or wall junctions. A ceiling stain can appear some distance from the entry point because water runs along the underside of the roof before dropping onto the ceiling. Do not climb onto a high, steep, wet, or damaged roof to chase a stain.
Check plumbing fixtures before blaming the roof
For an upstairs bathroom or kitchen, dry the accessible pipes and fittings, then use one fixture at a time while someone watches below. Check flexible hoses, trap joints, waste pipes, toilet connections, shower screens, and the sealant line around a shower or floor drain. A slow drain leak may only show after a full basin or shower has emptied.
If the affected area is below a sink cabinet, this under-sink leak checklist is a useful way to rule out common joints before you open any ceiling section. Avoid repeatedly using a fixture that clearly causes the stain to spread.
In condos and flats, inspect the bathroom floor-trap route
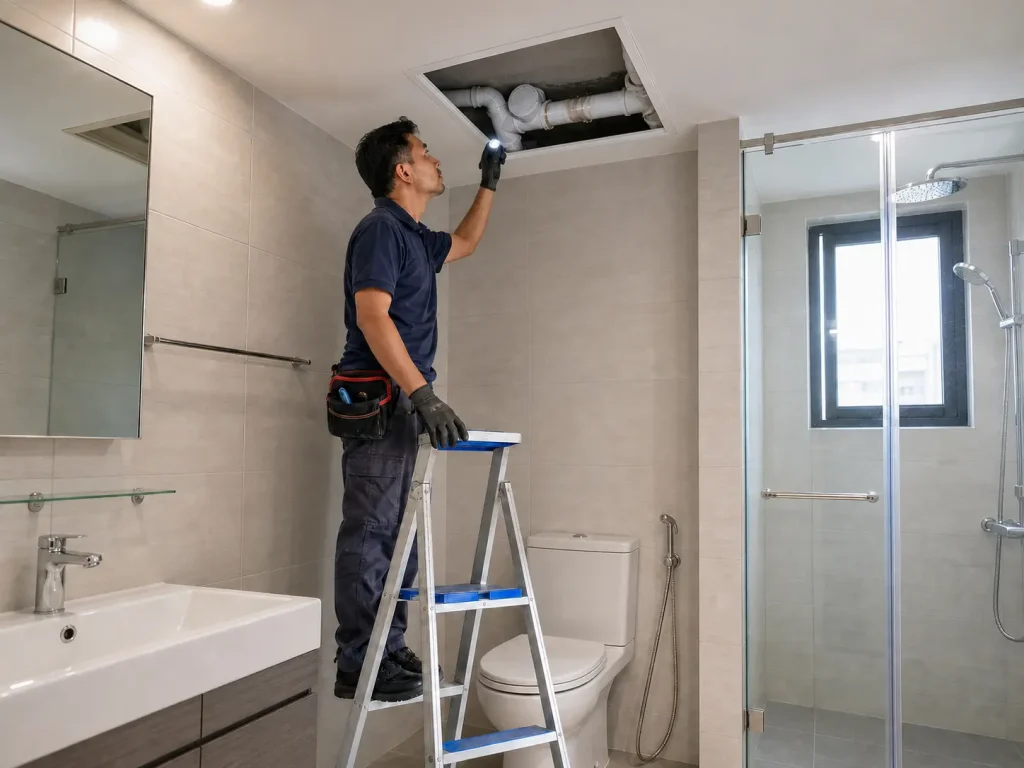
This pattern is especially common in Malaysian high-rise condominiums, apartments, and flats. The bathroom drainage from the unit above often runs through the slab or ceiling void above your bathroom before joining the building’s main vertical pipe. Depending on the building’s plumbing design, the branch may include a uPVC elbow or capped access point before that connection.
When hair, tissue, soap residue, or other debris is allowed to pass through the upstairs floor trap, it can collect at a bend or restricted point in the branch pipe. A partial blockage can make wastewater back up at a joint or access cap and drip into the ceiling below — sometimes only when the upstairs bathroom is being used. This is normally a shared diagnosis between the unit above, building management, and a plumber; do not assume it is a roof leak simply because the stain is on your ceiling.
Ask the upstairs occupant to stop using the affected floor trap temporarily while a plumber checks the drain route. The proper repair may involve clearing the blockage and resealing or replacing a leaking fitting, rather than repainting or patching your ceiling alone.
Rule out an air-conditioning drain issue
In Malaysia’s humid climate, a blocked condensate drain is a common reason for a localised ceiling stain near an indoor unit or concealed piping. Look for water dripping from the unit, weak cooling, a musty smell, or an overflowing drain tray. The fix may be as simple as clearing a drain line, but a damaged concealed pipe or failed insulation needs an air-con technician.
Phase 3: Confirm the Source Without Making the Damage Worse
Once you have a likely cause, test carefully and only one variable at a time. The goal is to reproduce the moisture safely — not to flood the area or cut open a ceiling on a hunch.
Use controlled checks
- Run one upstairs tap for several minutes, then wait and inspect the marked ceiling stain.
- Fill and drain a basin or take a short shower only if its use has not caused unsafe active dripping.
- Run the air-conditioner and check its drain outlet and the ceiling area after 20–30 minutes.
- After the next rain, compare the pencil outline and photos with the earlier record.
- Check your water meter with all water fixtures off; movement can point to a pressurised plumbing leak.
If the ceiling void is safely accessible through an existing access panel, use a torch to look for wet insulation, water trails, rusty fasteners, or drips on pipes. Do not push a hand through a soft ceiling, disturb electrical cables, or cut around a light fitting.
Know when to call a professional first
Bring in a roofer for a suspected roof entry point you cannot reach safely, a plumber for concealed supply or drain pipes, and an air-con technician for condensate issues. Call urgently if the ceiling is sagging, water is near electricity, mould is extensive, or the stain returns without an obvious cause.
A professional leak detection visit can be cheaper than replacing a large section of ceiling after several failed paint jobs. Keep your photos, rain/use notes, and a simple timeline — they give the technician a head start.
Phase 4: Repair and Dry the Area Before You Repaint
Repair the cause first, then let the ceiling dry completely. Depending on the material and how much water entered, this can take days or longer; ventilation and a dehumidifier can help, but neither replaces stopping the leak.
Check that the ceiling is ready for finishing
The area should feel dry and firm, with no new growth beyond your pencil line after the relevant test — rain, plumbing use, or air-con use. Remove loose paint or softened material only after the source is fixed. If plasterboard, fibre-cement board, or insulation is swollen, crumbly, mouldy, or deformed, replace the damaged section rather than trying to seal it under paint.
Prime the stain instead of hoping paint will cover it
Once the surface is clean, sound, and fully dry, patch minor damage, sand the repair smooth, then apply a stain-blocking primer suitable for water marks. Ordinary ceiling paint can let yellow-brown staining bleed back through; use the primer according to its label before applying matching ceiling paint.
For the final preparation and paint choice, FixRight’s primer versus paint guide for Malaysia’s tropical climate explains why the right base coat matters. Test the colour in a small area before repainting the full ceiling, especially if the existing white has aged.
What Not to Do With a Water Stain on the Ceiling
- Do not paint over a damp stain — it conceals the clue while moisture continues behind the finish.
- Do not assume the leak is straight above — follow the timing and the structure around the stain.
- Do not use a hose test indiscriminately — it can send water into unaffected areas and confuse the diagnosis.
- Do not seal every roof joint at random — repairs need to match the actual entry point and roof material.
- Do not ignore a stain near a light fitting — treat it as an electrical risk until proven otherwise.
Final Thoughts: Stop the Leak, Then Restore the Ceiling
A ceiling water stain is useful evidence. Its position, timing, and behaviour can tell you whether to look at the roof, a bathroom pipe, or an air-con drain — provided you record what changes before covering it up.
Once the source is repaired and the ceiling is properly dry, the cosmetic work becomes straightforward: replace damaged material if needed, use a stain-blocking primer, and repaint. FixRight is here to help you make that sequence clear and avoid doing the same job twice.
Trace the cause first, fix the leak properly, and only then give your ceiling a clean new coat of paint.