

Black spots, loose edges, and missing sections of bathroom sealant are more than an eyesore. Once the bead has pulled away from the tile, basin, shower screen, or bathtub, water and soap residue can collect in the gap.
This guide shows you how to identify why the seal failed, remove the old silicone completely, choose a suitable wet-area product, and apply a clean new bead. The job is manageable for a careful beginner—but preparation and curing time matter more than speed.

Phase 1: Check Why Your Bathroom Sealant Is Failing
Do not cover old silicone with a fresh layer. First decide whether you are dealing with surface staining, failed adhesion, or a deeper leak that sealant cannot repair.
Look for these common signs
| What you see | Likely situation | Appropriate next step |
|---|---|---|
| A few light black spots on a firm, fully bonded bead | Surface mould or residue | Clean it first and monitor |
| Black staining that remains inside the silicone | Mould has penetrated or stained the bead | Remove and replace the bead |
| An edge lifts when touched | Adhesion has failed | Replace the full affected run |
| Cracks, gaps, or missing pieces | The bead has aged, moved, or was applied poorly | Remove and reseal |
| Sealant feels soft, sticky, or never cured properly | Incompatible, expired, or incorrectly applied product | Remove it and check the replacement label carefully |
| Damp wall, loose tile, swollen cabinet, or water below the bathroom | Possible plumbing or waterproofing failure | Find the leak before resealing |
Black staining tends to return when a bathroom stays damp and soap residue remains on the joint. Even mould-resistant sanitary silicone is not mould-proof—ventilation, drainage, and regular cleaning still matter.
Know when sealant is not the real repair
A new surface bead cannot fix a leaking pipe, failed shower tray, loose tile, or damaged waterproofing membrane. Stop and arrange a plumber or waterproofing contractor if water appears through the ceiling below, tiles sound loose, the wall feels soft, or the joint stays wet when the bathroom has not been used.
If paint outside the wet area is bubbling or flaking, use the guide to why paint peels in Malaysian homes to trace the moisture source before repainting.
Phase 2: Choose the Right Bathroom Sealant and Tools
For a shower, basin, bathtub, or tiled bathroom joint, look for sanitary silicone labelled for kitchens, bathrooms, wet areas, or glazing. A neutral-cure, mould-resistant product is a practical all-round choice for many tile, glass, metal, and selected plastic surfaces—but always check the cartridge for compatibility with your exact materials.
Compare the main sealant types
| Product type | Suitable for a constantly wet bathroom joint? | What to know |
|---|---|---|
| Sanitary silicone | Yes | Flexible and designed for wet areas; choose a mould-resistant formula |
| General-purpose silicone | Sometimes | Use only if the label lists your wet-area application and surfaces |
| Acrylic sealant or painter’s caulk | Usually no | Paintable and useful for dry gaps, but not the first choice inside a shower |
| Polyurethane sealant | Only for specified applications | Strong and durable, but harder to tool and remove; check material compatibility |
Silicone, acrylic, and filler solve different problems. If you are unsure which material belongs in another part of the home, see FixRight’s guide to wall filler, putty, and sealant.
Check the cartridge before buying
- It says sanitary, kitchen and bathroom, or wet area.
- It lists the surfaces you need to join—for example ceramic tile to glass, metal, acrylic, or stone.
- The colour suits the joint: white is forgiving around white sanitaryware, while clear suits glass and mixed finishes.
- The cartridge is within its expiry date and has been stored properly.
- The stated curing time fits how long you can keep the area dry.
Natural stone, mirrors, acrylic bathtubs, and some plastics may need a specific compatible silicone. When the label is unclear, take a photo of the joint and note both materials before asking the hardware shop or manufacturer.
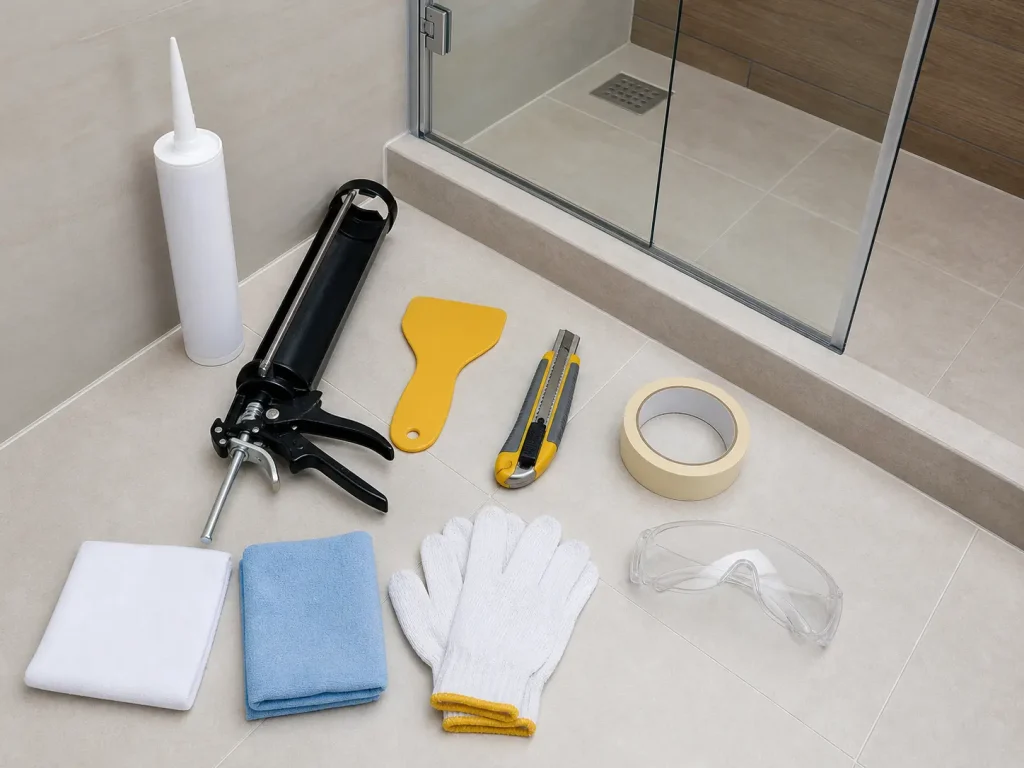
Gather your tools and materials
- Sanitary silicone — a cartridge for longer runs or a squeeze tube for a small basin joint.
- Caulking gun — required for a standard cartridge.
- Utility knife or sealant-removal tool — for cutting the old bead away.
- Plastic scraper — less likely than metal to scratch tile, glass, or sanitaryware.
- Manufacturer-approved cleaner — for removing residue without harming the surface.
- Clean cloths and masking tape — for a dry joint and straight edges.
- Gloves and eye protection — useful while cutting and cleaning overhead or vertical joints.
Phase 3: Remove the Black or Peeling Silicone Completely
New silicone bonds to the surface—not reliably to cured old silicone. Leaving a thin film behind can make a replacement bead peel early.
Cut and lift the old bead
Work in a ventilated bathroom and keep your free hand away from the blade. If you use a chemical mould or sealant remover, follow its label and never mix cleaning products.
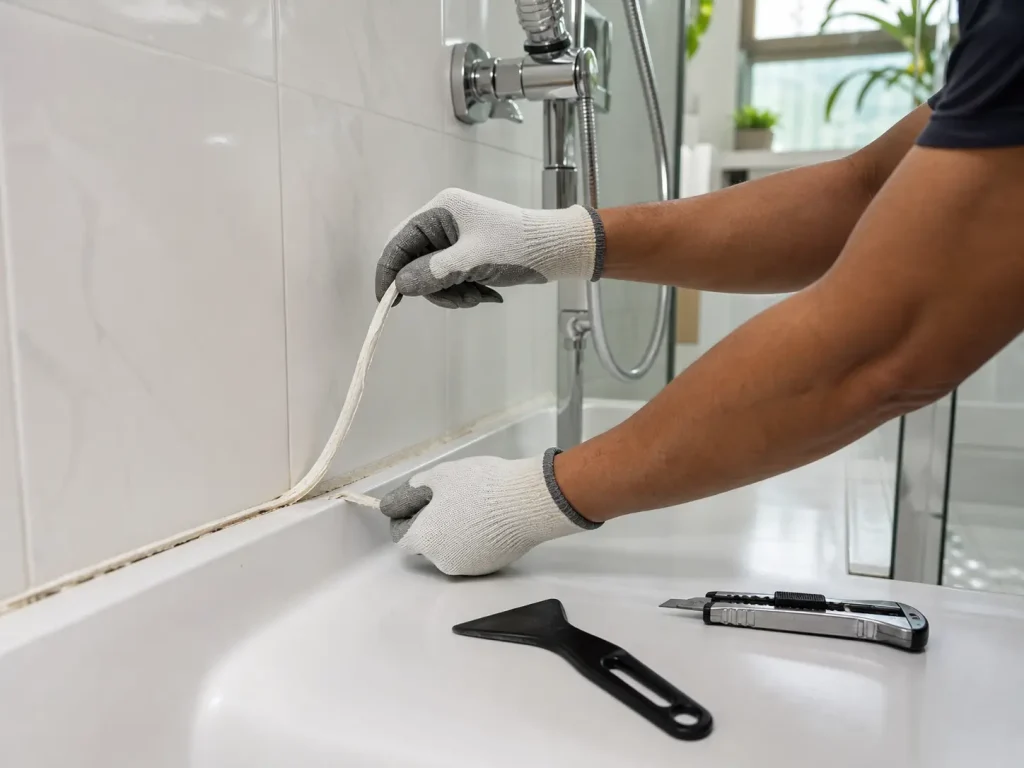
- Make a careful cut along both edges of the old bead.
- Grip one loose end and pull slowly; a well-cut strip may come away in a long piece.
- Use a plastic scraper to lift the remaining fragments.
- Apply a compatible silicone-remover product only if stubborn residue remains, then follow its waiting and cleaning instructions.
Use light pressure around acrylic sanitaryware, coated metal, natural stone, and plastic shower frames. A sharp metal blade can leave permanent scratches even when the silicone comes off easily.
Remove every trace of residue
Run a clean finger inside a glove over the dry joint. If it still feels rubbery or slippery, more residue is present.
Clean with the product recommended for the surface and silicone system. Do not improvise with oil-based cleaners—the film they leave can interfere with adhesion.
Phase 4: Clean, Treat, and Dry the Joint
This stage determines whether the new bead grips properly. The joint must be sound, clean, dry, and free of dust, grease, soap, cleaner, and old sealant.
Clean black residue safely
Use a bathroom mould cleaner that is compatible with the tile, grout, frame, and sanitaryware. Follow the label’s contact time and rinsing instructions.
Rinse away any cleaner that requires rinsing. Then wipe the area and allow the joint to dry fully—especially at corners where water can sit behind the surface.
Give the joint enough drying time
Do not reseal immediately after a shower or cleaning. Use the bathroom fan, open a window where practical, and keep the joint out of service until no moisture remains.
If water keeps appearing from inside the gap, pause the job. Persistent moisture suggests an active leak or trapped water that needs to be resolved first.
Phase 5: Apply the New Bathroom Sealant Neatly
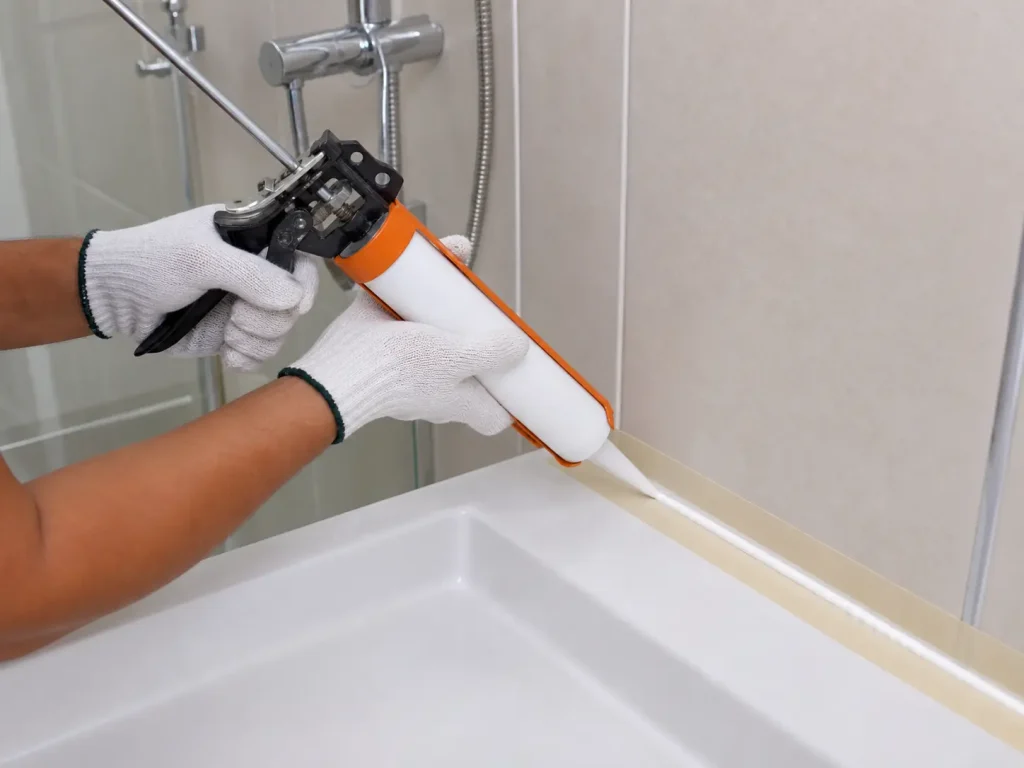
Masking tape gives a beginner a cleaner line, but it does not replace good control. Aim for one continuous bead that contacts both sides of the joint without gaps.
Mask and prepare the nozzle
- Apply masking tape on both sides of the joint, leaving the intended bead width exposed.
- Cut the nozzle at roughly a 45-degree angle, starting with an opening slightly smaller than the required bead.
- Pierce the cartridge seal if the packaging requires it, then load the cartridge into the gun.
- Test the flow on cardboard before moving to the bathroom joint.
For a deep or unusually wide gap, do not keep filling it with extra silicone. Ask whether a suitable backer rod or a repair to the substrate is needed first.
Lay one steady bead
Hold the nozzle against the joint and move at a steady pace while maintaining even pressure. Keep the opening aimed into the gap so the silicone contacts both surfaces rather than sitting loosely on top.
Work one manageable section at a time. Stopping and restarting repeatedly can leave thin spots where water collects.
Tool the bead and remove the tape
Smooth the silicone within the working time stated on the cartridge, using a proper profiling tool or the manufacturer’s recommended method. The finished bead should be continuous and gently shaped so water does not sit along its edge.
Pull away the masking tape while the silicone is still wet, drawing it away from the bead at an angle. If a ridge remains, make one light finishing pass without repeatedly disturbing the surface.
Phase 6: Let the Bathroom Sealant Cure Properly
Silicone can form a surface skin within minutes while remaining uncured underneath. Do not judge readiness by touching the top.
Keep the joint dry and untouched for the full curing period printed on the cartridge. Temperature, humidity, bead depth, and product formula all affect the timing, so the product instructions should take priority over a general rule.
Inspect before using the area
- The bead is continuous from end to end.
- Both edges are bonded with no lifting or pinholes.
- No tape, cleaner, or old silicone remains beside the joint.
- The manufacturer’s full cure time has passed.
- Water drains away instead of pooling against the bead.
The preparation and tooling principles are similar to those used when you caulk a window to keep rain out, although the correct product depends on the location and surfaces.
How to Keep New Bathroom Sealant from Turning Black Again
You cannot keep a busy Malaysian bathroom permanently dry, but you can reduce the conditions that allow black staining to return.
- Improve airflow — run the exhaust fan during and after showers, or open a window when weather and security allow.
- Remove standing water — squeegee shower glass and ledges so water does not sit along the bead.
- Clear soap residue — clean gently and regularly using products compatible with the silicone and surrounding materials.
- Repair slow leaks — a dripping mixer, shower hose, or pipe joint keeps the area damp between uses.
- Check the edges monthly — early lifting is easier to correct before water works behind the entire run.
Avoid aggressive scrubbing that cuts or pulls at the silicone. Mould-resistant describes added protection—it does not mean the joint can be left wet and dirty indefinitely.
Bathroom Sealant Replacement FAQs
Can I put new silicone over old silicone?
It is not a dependable repair. The new bead needs clean contact with the underlying surfaces, so remove the old silicone and its residue before applying the replacement.
Can I use grout instead of silicone at a corner?
Grout is rigid, while junctions between walls, floors, basins, bathtubs, and shower frames can move slightly. Use the flexible joint material specified for that location rather than automatically filling every line with grout.
Why did my new sealant peel after a few days?
Common causes include moisture, soap or cleaner residue, old silicone film, an incompatible product, or using the area before curing finished. Remove the failed section and correct the preparation issue instead of applying another layer on top.
Should I choose white or clear silicone?
Choose based on the surrounding finish, not performance alone. White often blends with white basins and bathtubs; clear is useful around glass or where two different surface colours meet.
How often should bathroom sealant be replaced?
There is no fixed schedule that suits every bathroom. Replace it when it loses adhesion, cracks, remains deeply stained, or no longer forms a continuous seal—not simply because it reaches a certain age.
Final Thoughts: Preparation Makes the Seal Last
Replacing bathroom sealant properly is mostly a preparation job. Choose sanitary silicone that matches the surfaces, remove every trace of the failed bead, let the joint dry, and give the replacement its full curing time.
These checks help you avoid buying the wrong tube or repeating the job a few days later. FixRight Hardwares is here to help Malaysian homeowners match the material to the repair before they start.
Inspect the joint, confirm the surface materials, and choose the right sanitary silicone before you reseal.