

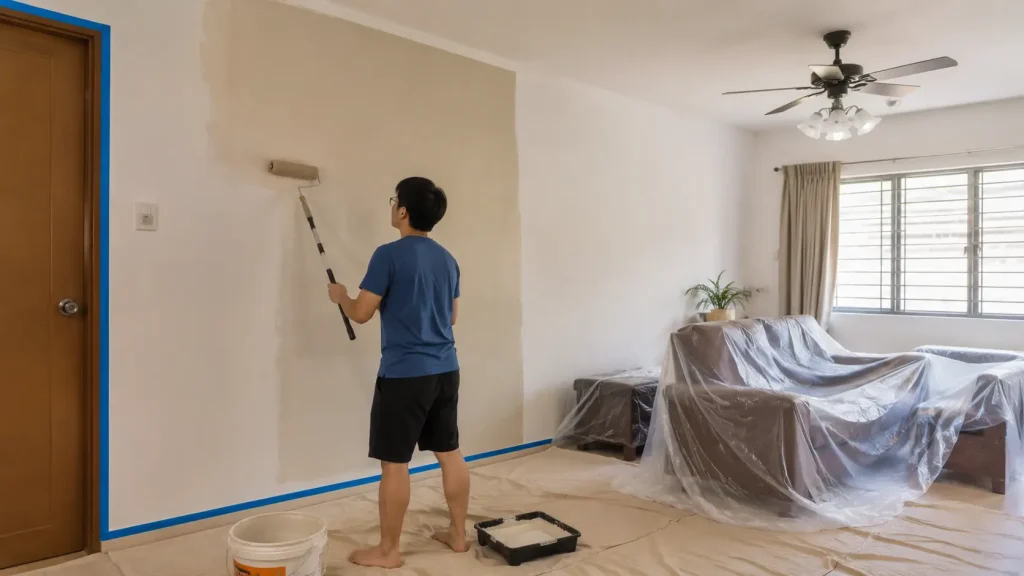
Most painting disasters are avoidable. The drips on the floor, paint splattered on the skirting, roller marks on the ceiling — none of that is inevitable. It almost always comes down to skipping prep, rushing the job, or using the wrong tools.
This guide walks you through how to paint a room without making a mess, from moving furniture to the final clean-up — with tips specific to Malaysian homes, where humidity and heat add their own complications.
Why Most Painting Messes Happen
Before diving into the steps, it helps to understand where things go wrong. The most common causes of a messy paint job are:
- Skipping room prep — no drop cloths, no tape, bare floors left exposed
- Not prepping the walls — painting over cracks, dust, or flaking old paint
- Wrong tools — cheap rollers that shed lint, brushes that drip, flimsy trays that tip
- Rushing between coats — not waiting for each layer to dry before applying the next
- Malaysia’s humidity — painting on a wet or poorly ventilated day leads to bubbling, sagging, and paint that takes forever to cure
Fix these five things and you’ve already eliminated 80% of painting problems.
Step 1: Prep the Room Before You Open Any Paint
This is where most DIYers go wrong — they skip straight to painting. Don’t. Room prep is what separates a clean job from a disaster.
Move Furniture Out (Or Push It to the Centre)
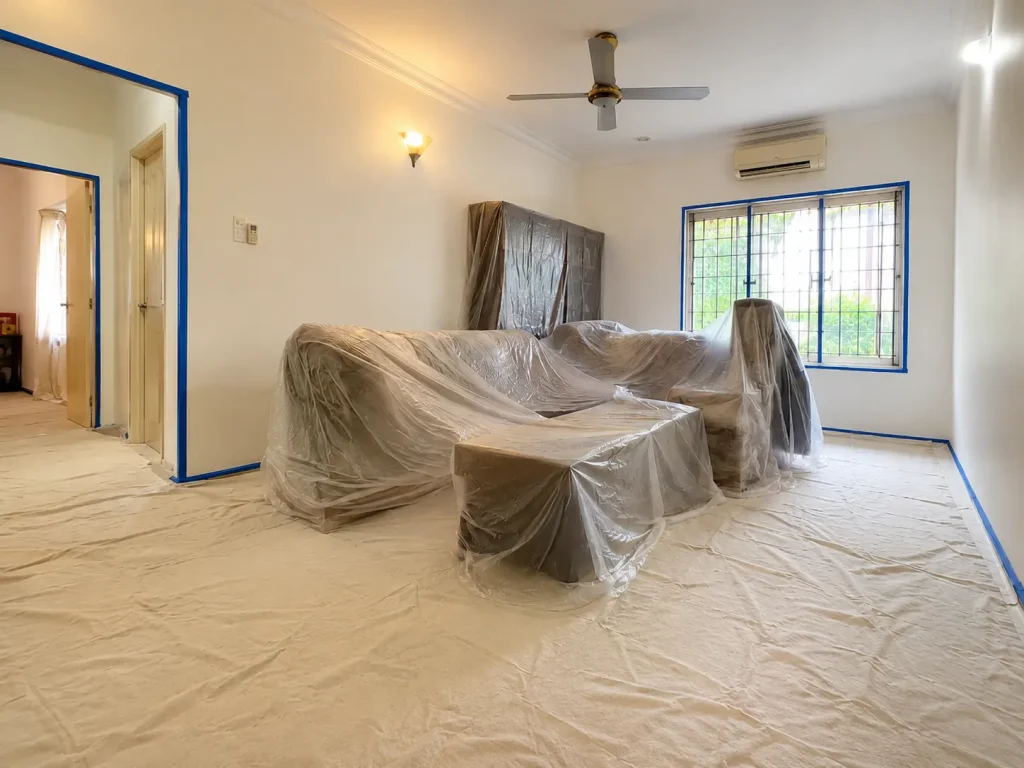
Ideally, move everything out of the room. If that’s not possible, push all furniture to the centre and cover it with plastic sheeting or old bedsheets. Don’t try to paint around furniture — you will splash it, guaranteed.
Cover the Floor
This is non-negotiable. Use a canvas drop cloth — available on Shopee and Lazada from around RM25–RM60. Canvas beats plastic every time: it stays flat, doesn’t slip underfoot, and absorbs drips instead of letting them spread across the whole floor.
Lay the cloth along every wall you’re painting. Overlap the edges by at least 30cm so roller splash doesn’t sneak past the edge.
Tape All Edges
Run masking tape along:
- Skirting boards and architraves
- Window frames and door frames
- The ceiling line (if you’re painting walls only)
- Power socket covers and light switch plates — or remove the covers entirely
3M blue masking tape is the go-to choice — available at hardware shops and on Shopee for around RM8–RM15 per roll. Press the tape edge down firmly with your fingertip so paint can’t bleed underneath. Remove the tape while the last coat is still slightly wet, not after it’s fully cured, to get a clean tear-free edge.
Step 2: Prep the Walls
Painting over unprepared walls is the fastest way to a result that looks terrible and doesn’t last. Spend 30 minutes here and you’ll save yourself two rounds of repainting.
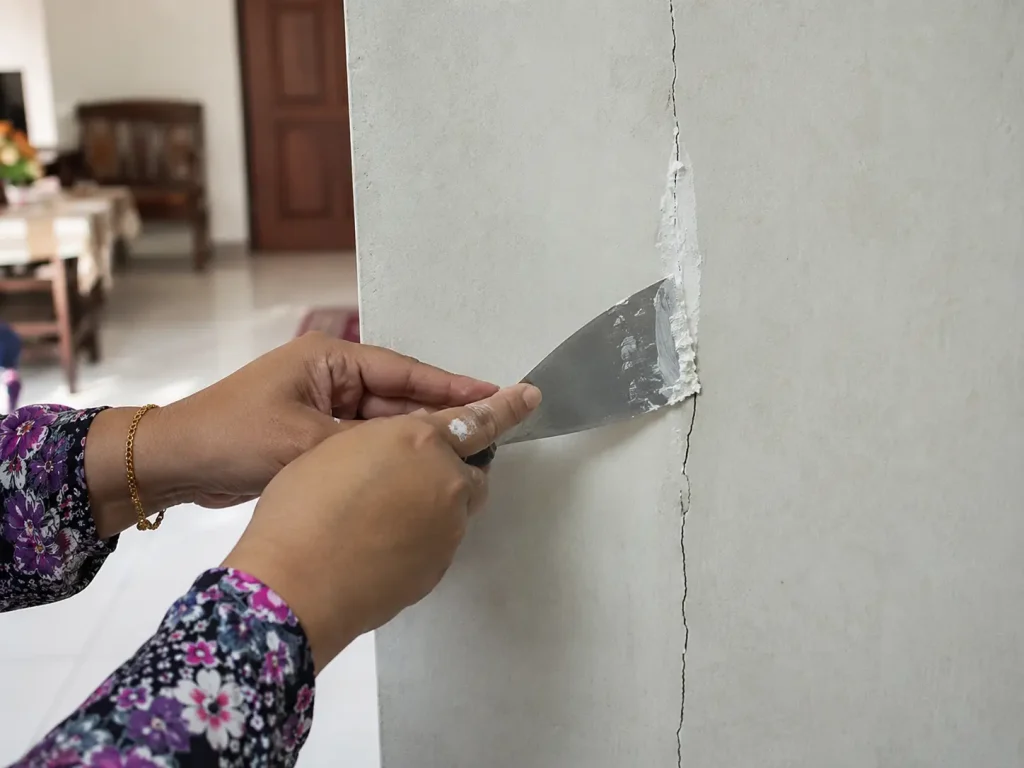
Fill Holes and Cracks
Any nail holes, anchor bolt holes, or hairline cracks need to be filled before a single drop of paint goes on. If you’re unsure which product to reach for, our guide on wall filler vs putty vs sealant covers what each product is for and when to use it.
For larger damage — holes left by conduit, removed fixtures, or chipped concrete — you’ll need a proper patching compound and a slightly different technique. Our step-by-step guide on how to patch a hole in your wall walks through it in detail.
Sand the Surface Smooth
Once the filler is fully dry, sand it flush with the surrounding wall. For filled spots, 150–180 grit is the right range. If the whole wall has rough patches or old paint buildup, a light sand over the entire surface helps the new paint bond evenly. Our sandpaper grit guide explains which grit to use for each stage of wall prep.
Clean the Wall
Wipe the entire wall with a damp cloth to remove dust, grease, and cobwebs. Pay particular attention to areas near the kitchen and around light switches — grease and fingerprint oils prevent paint from sticking. Let the wall dry completely before you move to priming or painting.
Step 3: Prime First — Especially in Malaysian Homes
In Malaysia’s humid tropical climate, skipping primer is a common mistake that leads to paint peeling within months. If you’re painting a new wall, repainting over a dark colour, or covering a repaired patch, you need primer.
Not sure if your walls actually need it? Our article on do you need primer before painting breaks it down clearly for Malaysian conditions — new walls, repaints, repaired surfaces, and exterior walls all have different requirements.
For most Malaysian interior walls, Nippon Paint Sealer or Dulux Alkali Resistant Primer are the right starting point — both are widely available at hardware shops and on Shopee. Apply one even coat, let it dry fully (at least 2–4 hours in well-ventilated conditions), then proceed to your topcoat.
Skipping this step is one of the main reasons paint peels in Malaysian homes — especially on exterior walls and in bathrooms. Getting primer right the first time saves you a full repaint within a year.
Step 4: Paint in the Right Order
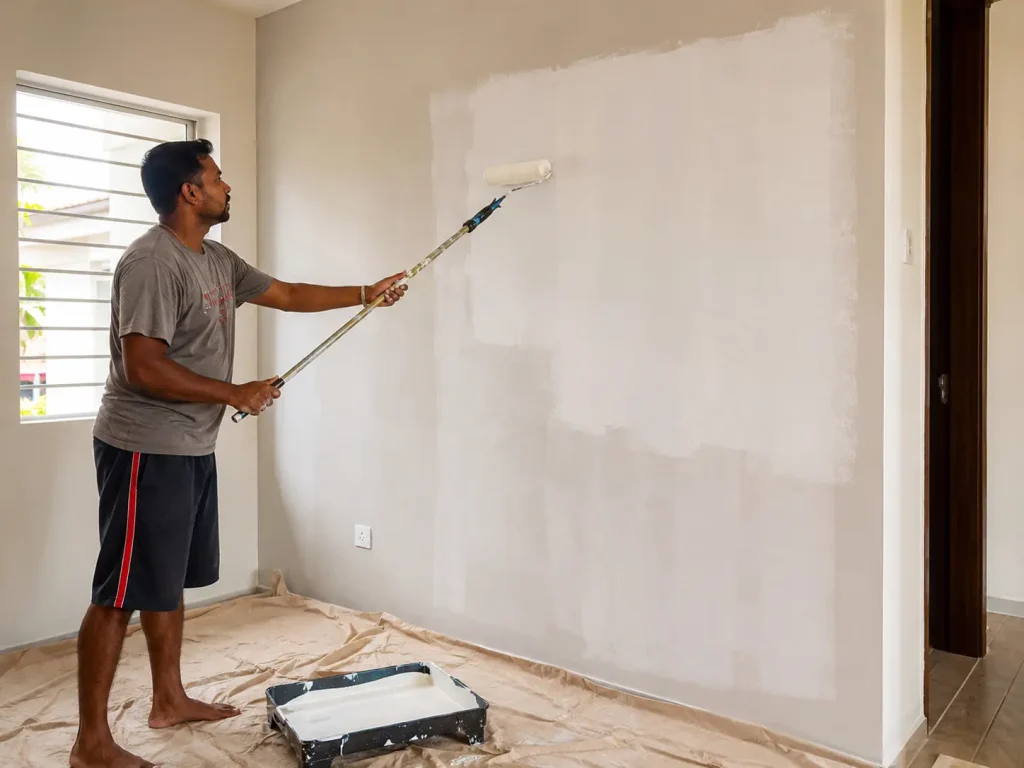
Always work top to bottom. Drips from higher surfaces fall onto unpainted (or already-protected) areas below — not onto your freshly finished work.
The correct painting order:
- Ceiling — if you’re repainting it
- Walls — the main surfaces
- Trim — skirting boards, door frames, architraves last
Cut In First, Then Roll
Before picking up the roller, use a brush to “cut in” — paint a 5–8cm band along all edges: the ceiling line, wall corners, around window frames and door frames. This gives the roller a clean boundary to roll up to.
Use an angled cutting-in brush (sometimes called a sash brush) for this. Steady, controlled strokes work better than quick ones. Don’t rush the cutting-in stage — this is what makes your edges look professional.
Step 5: Roller Technique That Prevents Drips and Splatter
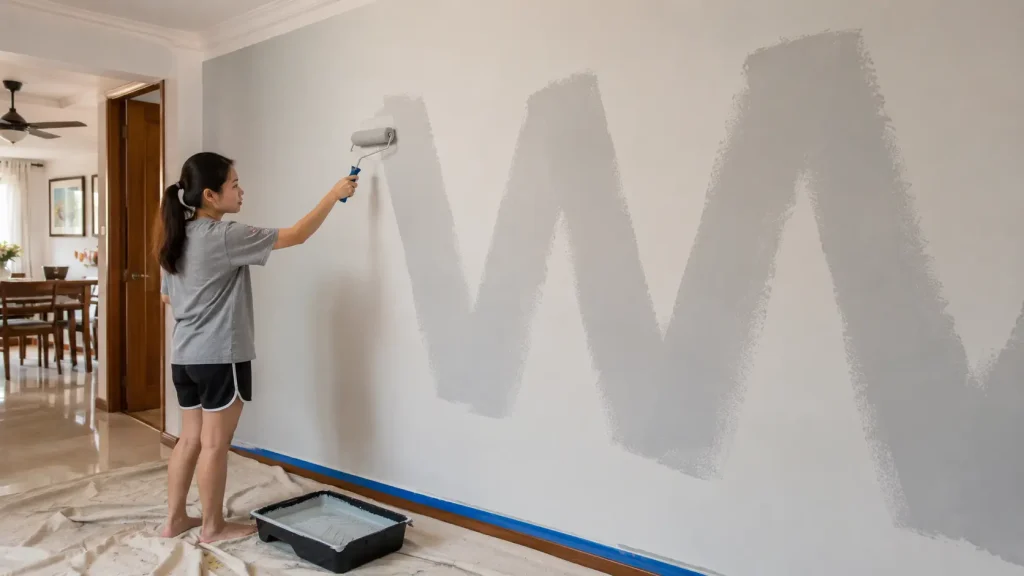
A proper roller technique is the difference between a clean finish and a splattered disaster.
Load the roller correctly:
- Pour paint into a roller tray — never dip directly from the tin
- Roll through the paint, then run the roller over the ribbed section of the tray several times to distribute paint evenly and remove excess
- A correctly loaded roller should look fully coated, not dripping
Roll in a W or M pattern:
- Apply paint in a large W or M shape across a roughly 60x60cm section of wall
- Fill in the shape with vertical strokes, overlapping each pass by about 30%
- This distributes paint before spreading it thin, giving even coverage without lap marks
Don’t press too hard. Excessive pressure causes drips and uneven texture. Let the weight of the roller do the work.
Keep a wet edge. Work quickly enough that you’re always joining wet paint to wet paint — rolling into a dry edge is how lap marks form.
Not sure whether a brush, roller, or spray gun is right for your project? Our comparison of brush vs roller vs spray helps you match the best painting method to every surface in your home.
Dealing with Malaysia’s Humidity and Heat
Humidity is the hidden enemy of a clean paint job. Here’s how to manage it in Malaysian conditions:
Don’t paint during or after heavy rain. High ambient humidity slows drying dramatically and can cause emulsion paint to sag, bubble, or take days to cure — even indoors. If you’re painting inside during the monsoon season, open windows and use a standing fan to keep air moving.
Wait longer between coats than the tin says. Most water-based emulsion paints claim 1–2 hours between coats. In Malaysia’s humidity, add at least another 1–2 hours on top of that. Run your hand lightly over the surface — if it feels even slightly tacky, it’s not ready. Wait.
Ventilate the room properly. Open windows on opposite walls to create a cross-breeze. If you’re painting a bathroom with no window, point a fan towards the doorway to pull fumes and moisture out. Enclosed spaces trap both fumes and humidity, both of which affect finish quality.
Avoid painting in direct afternoon sun on exterior walls. The surface temperature is too high, causing the paint to skin over before it can bond to the substrate. Early morning — before 9am — is the ideal window for exterior painting in Malaysia.
Clean-Up Tips
A clean job ends with a clean room. Don’t let the final 20 minutes undo everything you just did.
Pull the tape while the last coat is still slightly wet. Peel it back at a 45° angle, slowly and steadily. If the paint has dried fully, score along the tape edge with a utility knife before pulling — otherwise you’ll chip the fresh paint.
Clean brushes and rollers immediately after use. For water-based paint, rinse thoroughly under running water, squeezing and working the bristles until the water runs completely clear. Store brushes with bristles hanging down or laying flat — never standing on the tips.
Wipe up drips as they happen. Keep a damp cloth within reach throughout the job. Fresh paint drips wipe off in seconds. Dried drips need a scraper and considerably more patience.
Handle leftover paint responsibly. Don’t pour paint down the sink or drain — it’s harmful to waterways. For small amounts, leave the lid off and let it dry out in the tin, then dispose with regular waste. For larger quantities, check with your local hardware shop or Alam Flora for proper disposal options.
Common Mistakes to Avoid
| Mistake | What Happens | The Fix |
|---|---|---|
| Skipping the drop cloth | Paint on floor tiles, parquet, or carpet | Always cover before opening any paint tin |
| Not taping edges | Paint on skirting boards and door frames | 3M tape takes 10 minutes — always worth it |
| Painting over dust | Paint adhesion fails, finish looks rough | Wipe walls clean before priming or painting |
| Skipping primer | Colour bleeds through, paint peels early | Prime any new, repaired, or dark-coloured surface |
| Overloading the roller | Drips run down the wall | Roll off excess on the ribbed section of the tray |
| Painting in high humidity | Bubbling, sagging, slow or uneven cure | Check weather; use fans; wait longer between coats |
| Pulling tape after paint dries | Edge tears, paint chips | Pull tape while the last coat is still slightly wet |
You’ve Got This
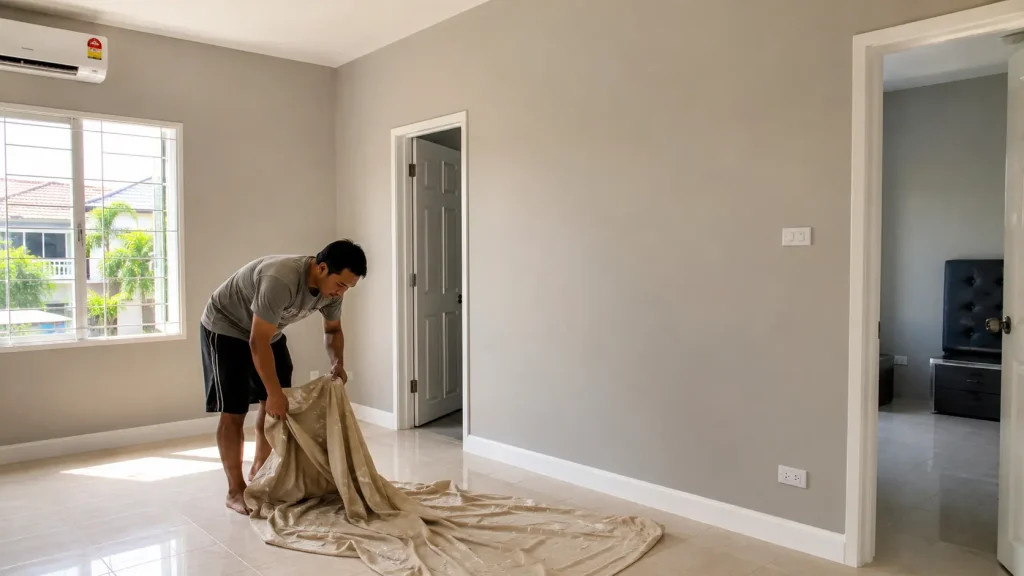
Painting a room without making a mess isn’t about talent — it’s about preparation. Spend the first hour setting up properly: move the furniture, lay the drop cloth, tape the edges, fill the cracks, sand smooth, clean the surface. That hour of prep saves you an afternoon of cleaning up a disaster.
Work top to bottom, don’t rush between coats, and keep the room ventilated — especially in Malaysia’s humidity. By the time you’re done, you’ll have walls that look professionally finished and a floor that’s still spotless.
Have a specific painting challenge in your home? Drop your question in the comments below.