

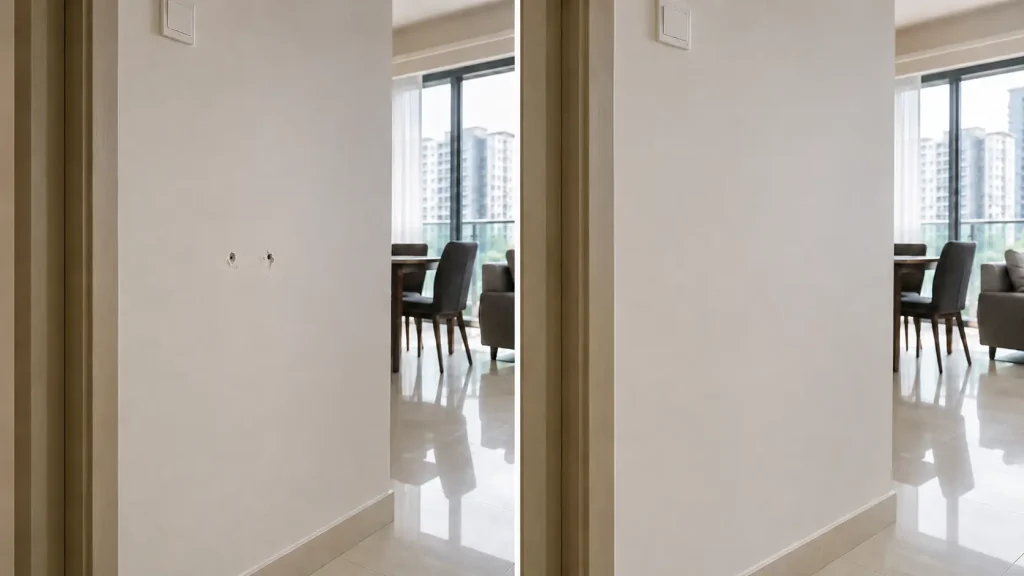
You hung a picture frame, decided to move it, and now there’s a raw anchor hole staring back at you. Or a contractor drilled through the wrong spot. Or a doorknob punched clean through the wall during a particularly dramatic afternoon.
Whatever caused it, you want it gone — without any trace.
Here’s the honest truth about patching walls in Malaysian homes: most guides online are written for Western homes with drywall (plasterboard) walls. But if you live in a Malaysian apartment, condo, terrace house, or semi-D, your walls are almost certainly cement plaster over brick or concrete — and patching them requires a completely different approach.
This guide covers exactly that: how to patch holes of any size in cement walls, using materials available at any local hardware store, and get a finish that disappears completely under paint.
First: Know What You’re Working With
In Malaysia, almost all walls in residential properties are one of two things:
Brick or concrete block walls covered in a cement plaster (render) finish, then painted. This is the standard for most terrace houses, semi-Ds, apartments, and condominiums — even newer ones. Knock on the wall and it sounds dense and solid.
RC (reinforced concrete) structural walls in high-rises — the slabs and external walls. These are even harder and denser.
Both types are patched the same way: using cement-based fillers, patching plaster, and wall putty. The process is different from drywall repair — cement needs moisture to bond properly, it takes longer to cure, and you build it up in layers rather than applying one thick coat.
The one exception: some newer condominiums use plasterboard (drywall) partition walls for internal room dividers — typically non-load-bearing walls between bedrooms or between a room and a corridor. If your wall sounds hollow when knocked, it might be plasterboard. But the vast majority of walls Malaysian homeowners encounter are cement.
Common Hole Types in Malaysian Homes
Understanding what you’re patching helps you pick the right approach.
Anchor bolt / wall plug holes — the most common. Left behind when you remove a mounted TV, shelf bracket, or curtain rod. Usually 6–12mm in diameter and 3–5cm deep.
Nail holes — small, shallow, from picture hangers. Under 5mm wide.
Chipping or spalling — a chunk of the plaster surface has broken off, leaving a shallow, irregular depression. Often caused by accidental impact or old, brittle plaster.
Conduit or pipe routing holes — medium to large holes left after electrical or plumbing work, sometimes 3–10cm across.
Impact holes — from a doorknob, corner of furniture, or a hard knock. Can range from a small divot to a fist-sized crater.
What You’ll Need
Pick based on your hole size. You don’t need everything on this list for a simple nail hole.
For Nail Holes and Dimples (Under 5mm)
- Wall putty (cat dinding) — available in small tubs or pre-mixed tubes
- Putty knife or even a spatula
- Fine sandpaper (220 grit)
- Primer and matching paint
For Anchor Bolt Holes and Small Damage (5mm–3cm)
- Ready-mix patching compound or patching plaster (sold in small tubs at most hardware shops — brands like Parex, Weber, or local equivalents)
- Alternatively: a cement + fine sand mix (1 part cement : 2–3 parts fine sand)
- Putty knife (3–4 inch)
- Water spray bottle
- Fine sandpaper (180 and 220 grit)
- Wall putty (for the final skim layer)
- Primer and paint
For Medium to Large Holes (3cm and Above)
- Patching plaster or mortar mix
- Small trowel or wide putty knife (6 inch)
- Wire mesh or expanded metal lath (for holes over 5cm, to give the filler something to grip)
- Water spray bottle
- Sandpaper (120 grit, then 220 grit)
- Wall putty
- Primer and paint
If you’re missing basic tools, our guide to the 10 tools every homeowner should own covers what’s worth having on hand before you need it.

The Critical Rule for Cement Walls: Dampen Before You Fill
This is the most important difference between patching cement walls and patching drywall.
Cement-based fillers need moisture to bond and cure properly. If you push filler into a dry hole, it dries too fast, shrinks, and will crack or pop out in days to weeks.
Before you apply any patching compound to a cement wall, spray the inside of the hole with water and let it absorb for a minute. The surface should be damp — not soaking, just visibly moist. Do this before every layer you apply.
Method 1: Fixing Nail Holes and Tiny Dimples
This takes about 10 minutes plus drying time.
Step 1 — Clean the hole. Use a putty knife tip or a nail to scratch out any loose plaster dust inside the hole. Blow out the dust.
Step 2 — Dampen lightly. Use a damp cloth or a finger dipped in water to moisten the inside of the hole.
Step 3 — Fill with wall putty. Load a small amount of wall putty onto your putty knife and press it firmly into the hole. Scrape it flush with the wall surface in a single smooth stroke. Don’t mound it up — flush or very slightly raised is fine.
Step 4 — Let it dry. Wall putty dries within 1–3 hours depending on humidity and ventilation. In Malaysia’s humid climate, run a fan to help it cure evenly.
Step 5 — Sand flush and paint. Once fully dry, sand lightly with 220-grit paper, wipe away dust, prime, and touch up with paint.
Method 2: Fixing Anchor Bolt Holes (The Most Common Repair)
Most anchor holes are 6–10mm wide and 3–5cm deep. This is the repair Malaysian homeowners do most often after removing mounted items.

Step 1 — Clear the hole. Use a screwdriver tip or nail to scrape out any loose debris, crumbled plaster, or old wall plug fragments. The hole should be clean and stable.
Step 2 — Dampen the hole. Spray the inside of the hole with water or dab it with a wet cloth. Let it absorb for 30–60 seconds.
Step 3 — Pack in the patching compound. Use your putty knife to press patching compound firmly into the hole, packing it in and slightly overfilling. The compound should be slightly proud of the wall surface — you’ll sand it flat later. Don’t try to get it perfectly flush on the first go; just make sure there are no voids inside the hole.
Step 4 — Let it cure. Patching plaster and mortar-based fillers need time to cure, not just dry. Give it at least 4–6 hours, or ideally overnight. In Malaysia’s humidity, curing is actually helped by the ambient moisture — just don’t blast it with a hair dryer.
Step 5 — Apply a skim of wall putty. Once the base fill has hardened, apply a thin skim coat of wall putty over the top. This fills any micro-pinholes and gives you a smooth, paintable surface. Feather it out slightly beyond the edges of the original hole — at least 2–3cm in every direction. One thin, smooth coat is enough.
Step 6 — Sand smooth. Once the putty is dry, sand with 180-grit to knock down any ridges, then 220-grit for a fine finish. Sand in light, circular motions. Wipe clean with a barely damp cloth.
Step 7 — Prime and paint. This step matters more than people realise — see the priming section below.
Method 3: Fixing Medium to Large Holes (3cm and Above)
Larger holes need to be built up in layers. Trying to fill a deep hole in one go causes the material to crack as it cures.

Step 1 — Prepare the edges. Chip away any loose or flaking plaster around the edges of the hole using a putty knife or scraper. You want solid, stable plaster as your border — not edges that could crumble later. Undercut the edges slightly (angle them inward) to give the filler a better mechanical grip.
Step 2 — For holes over 5cm: install mesh backing. Cut a piece of wire mesh or expanded metal lath slightly larger than the hole and push it in so it sits inside the wall cavity. Bend the edges back so they grip the sides of the hole. This gives your mortar something to key into and prevents the fill from sinking.
Step 3 — Dampen thoroughly. Spray the inside of the hole and the surrounding edges generously. Give it a full minute to absorb.
Step 4 — Apply the first layer (scratch coat). Mix patching plaster or a 1:3 cement-to-fine-sand mortar to a thick, peanut butter consistency. Press it firmly into the hole with your trowel or putty knife, filling to about half the depth. Scratch the surface with a nail or comb to give it texture — this helps the next layer bond. Don’t try to fill the whole depth in one coat.
Step 5 — Let it cure, then dampen again. Wait at least 4–6 hours. Before applying the second coat, dampen the first layer again so it doesn’t pull moisture out of the fresh coat too quickly.
Step 6 — Apply the second layer. Fill the remaining depth, bringing the surface level with — or very slightly proud of — the surrounding wall. Keep it as flat as possible. If the hole is very deep, you may need a third layer. The same rules apply: cure fully between coats, dampen before each one.
Step 7 — Skim with wall putty. Once the base layers are hard and cured, apply a thin skim coat of wall putty across the entire repaired area, feathering out well beyond the edges. For a large repair, feather out at least 10–15cm in every direction to avoid a visible hump.
Step 8 — Sand, prime, and paint. Sand starting with 120 grit for any raised spots, then finishing with 220 grit. Wipe clean. Prime. Paint.
Feathering: The Difference Between Visible and Invisible
The most common reason a patch is still visible after painting is poor feathering — the transition from patch to surrounding wall is too abrupt, creating a raised edge that casts a shadow in raking light.
The rule: your final skim coat of putty should extend 3–4 times wider than the hole itself. A 1cm anchor hole should have putty feathered out over a 4–5cm area. A 5cm hole needs feathering across 15–20cm.
Each coat should be wider and thinner than the last. By the final putty coat, you’re applying almost nothing at the edges — just a breath of material to blend the transition.
Take your time here. Feathering is the skill that makes the difference.
Priming: Non-Negotiable
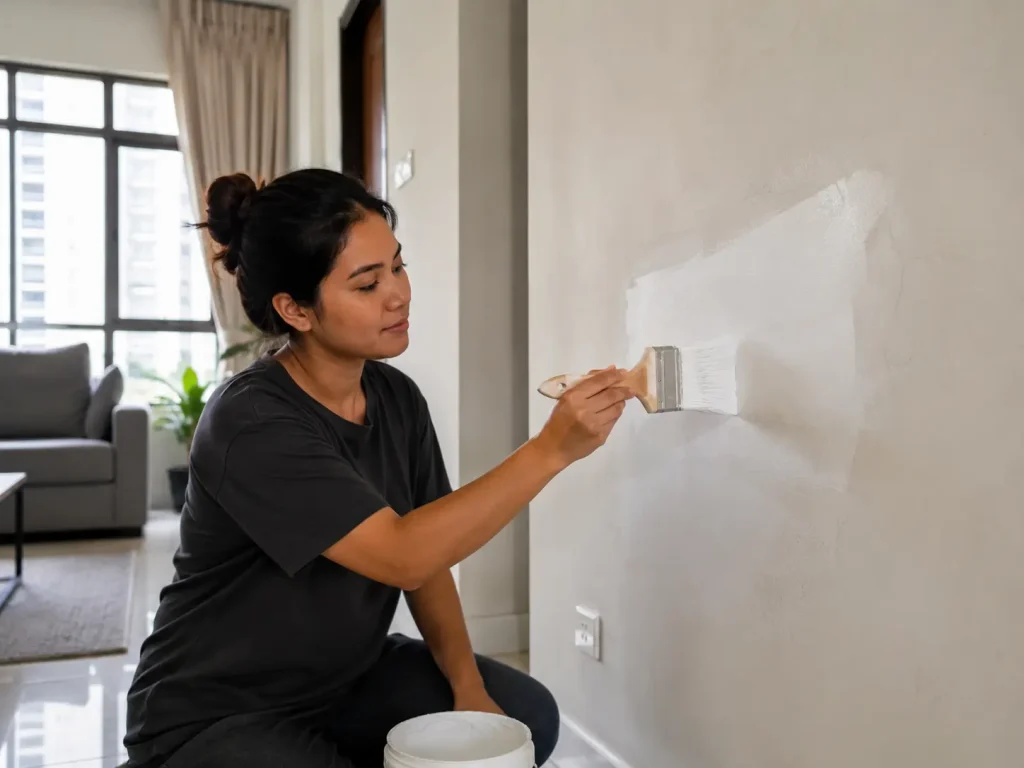
Cement-based fillers and wall putty are both porous. If you paint directly over them without primer, the paint soaks in at a different rate than the surrounding wall — you’ll see a dull, flat-looking patch (called “flashing”) even when the colour matches perfectly.
Apply a coat of PVA-based primer or a dedicated wall sealer over all repaired areas before your topcoat. Let it dry fully — in Malaysia’s humidity, give it at least an hour before painting over.
If the repaired area is large, prime the entire wall surface rather than spot-priming. This ensures the paint sheen is uniform across the whole wall.
Getting the Paint to Match
Even with a flawless patch, the wrong paint colour or finish will make it stand out. A few things to know:
Old paint fades. If your walls haven’t been painted in more than a year or two, touching up a small area almost never produces a perfect match — the surrounding paint has aged and yellowed slightly. For the most invisible result, repaint the entire wall from corner to corner.
Sheen matters as much as colour. Using a slightly different sheen — say, a semi-gloss touch-up on a matte wall — will be visible even if the colour is identical. Match both the colour code and the finish type.
Two coats minimum. One thin topcoat over a primed patch will look light and uneven. Always apply two full coats of topcoat for complete, even coverage.
Common Mistakes to Avoid
Skipping the dampening step. Dry cement walls suck moisture out of your filler too fast, causing it to shrink and crack. Always moisten the hole first.
Filling in one thick coat. Deep holes need layers. A single thick fill will crack in the middle as the outside dries faster than the inside.
Using wall putty as the only filler for deep holes. Wall putty is a finishing material — it’s meant for the final skim layer, not structural fill. For holes deeper than 3–4mm, always use a cement-based patching compound first.
Painting over uncured filler. Cement-based compounds need time to cure, not just look dry. If the filler still feels slightly cool or damp to the touch, it’s still curing. Give it overnight.
Not sanding properly. You need to choose the right sandpaper grit at each stage — coarser grit to knock down ridges first, finer grit for the smooth finish before priming.
When to Call a Professional
Most wall holes are entirely manageable as a DIY job. But call in a contractor when:
- The hole has exposed rebar (reinforcing steel) — this needs assessment for structural integrity and proper sealing to prevent rust
- You find moisture or staining behind the wall — this suggests a leak that must be fixed before any patching
- The surrounding plaster is soft, hollow-sounding, or blistering over a wide area — old plaster may need to be hacked and re-rendered, not patched
- The hole is from a pipe or conduit break — fix the pipe first, then patch
A handyman or minor works contractor in Malaysia typically charges between RM80 and RM300 for a single wall patch job, depending on size and location.
Repair It Once, Do It Right
Patching a cement wall hole comes down to three things done correctly: damp the hole, build up in layers, and feather the finish wide enough that there’s no visible edge.
The work itself is straightforward. The patience is the skill.
If you’re unsure which material to use — whether you need patching compound, wall filler, putty, or sealant — our guide on what wall filler, putty, or sealant to use walks you through the decision before you buy anything.